Sunday, October 30, 2016

Terrain Tool & Blueprint Practice Week 03

My goal this week was to learn more about using the terrain tool to create interesting environments, applying materials to the terrain with normal maps, and flexing the limits of what I can do with UE4 blueprints to create an interesting playable level.

I first looked for inspiration from the "popular" show MXC in creating my level, they always had fun and interesting obstacle courses - so I was looking to replicate something with a similar feel.


I started out by creating an interesting terrain with walkable paths along the cliff faces - I felt it would be an interesting environment for an obstacle course.


After getting my basics in and playing with a few blueprints, it was interesting enough, not very fun to play, and I found I had a lot of unused space. So without throwing away all the work I had done,
I switched gears and decided to use the obstacles in a more fitting environment.

I drew my inspiration from the design of old lumber mills and felt the mechanics I had created would find a better home in this kind of setting.


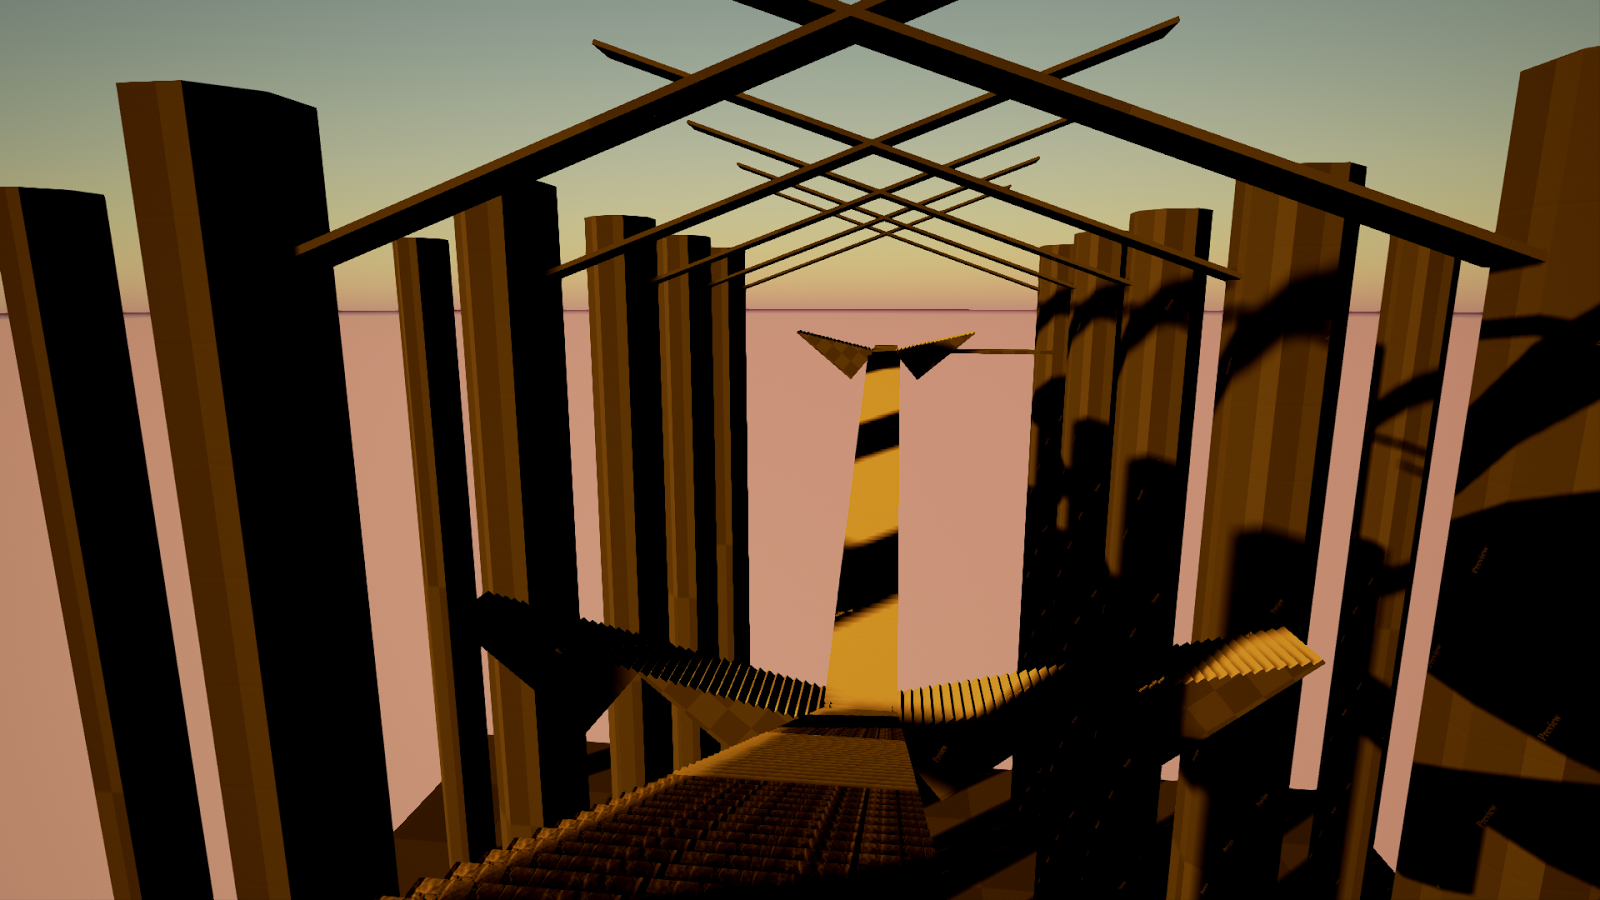
I created a lumber mill and set it alongside a riverbed, my goal was to make it feel like a more natural space rather than have a bunch of floating platforms - while keeping some of the more enjoyable platforming elements. 

Unfortunately I did not find time to make a flowing river, but if you use your imagination, anything is possible.


The first obstacle is The Wood Chipper, a giant spinning set of toothed logs, waiting to tear you apart.


The second obstacle is the Bed of Saws which spin menacingly and crisscross the walkable area.


The third obstacle is the Conveyor System, originally meant to pass logs from the bottom floor to the top, hopping across the platforms requires good timing.


Taking a pulley-drawn elevator to the top and climbing the ladder brings you to the walkway, not all is as it seems as some of the floor will fall out beneath you if you don't run fast enough!


The end of the walkway is gated off and requires a Keycard to pass through, fortunately someone left it handy nearby.


Past the iron bars is a fallen section of the walkway, climb the broken sections down into the still intact room to find a message from the mastermind of the operation!


In the interest of keeping the flow, I've decided to put all the blueprints I've used down below here, I will put up the links to all the tutorials I followed in the near future.


Enter volume, enable input, display message:
 Check Inventory for Keycard, Toggle Light, and Open Doorway:
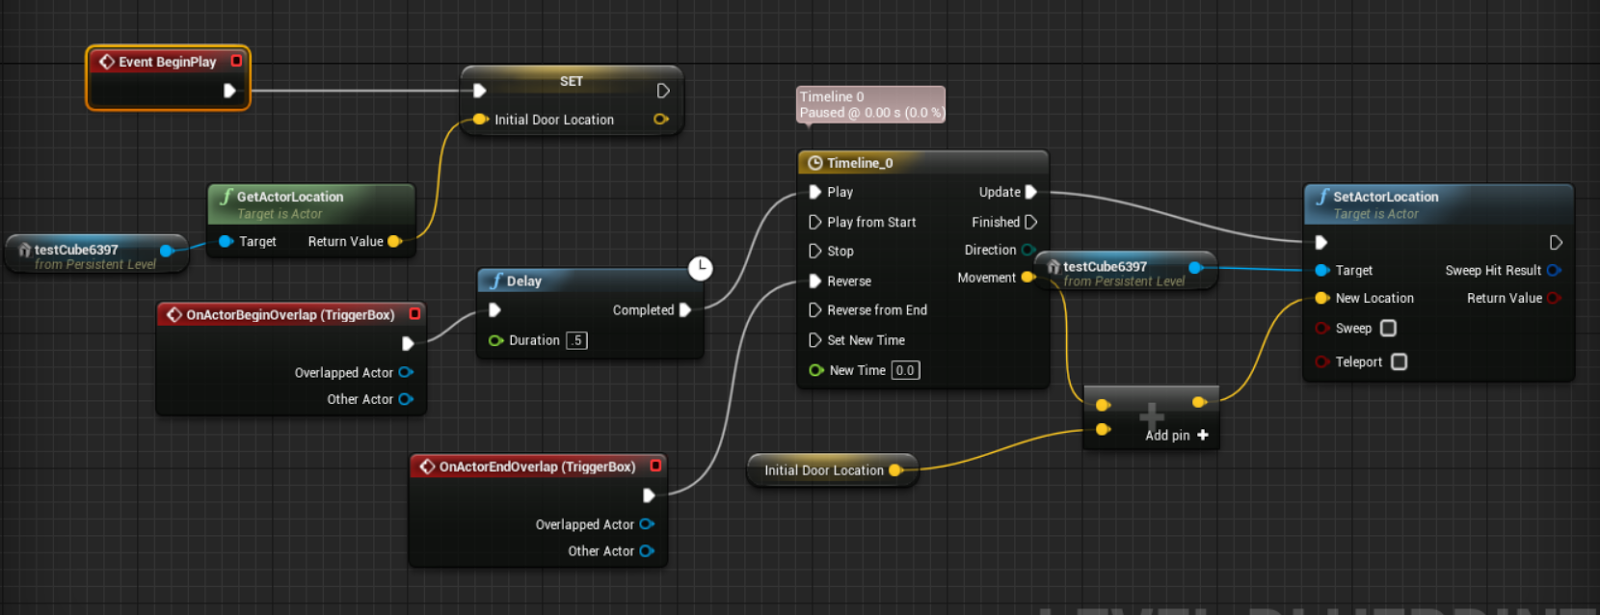
 Moving Platforms w/ return on exit
 Healthbar Update when Damage is Taken
 Add Keycard to Inventory Array
 Player damage on overlap w/ Health Check & Basic Respawn
 Spin Object over Time
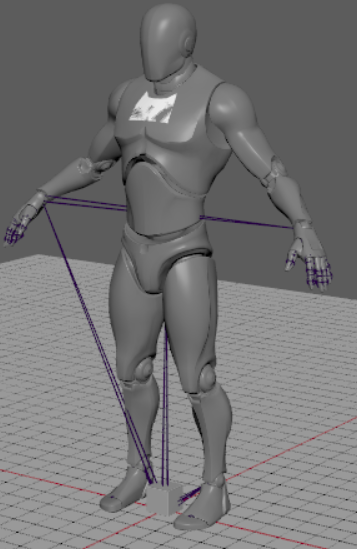
 The Wallclimb blueprint is extensive, but essentially it raycasts to check if there is a mesh within X units of the player, if True enable input and w/ User Input modify forward and right user input vectors to move along the up and right left axes  -- you will see the blueprint also includes a "Press E to Wallclimb" text render component, but I shut it off because it was responding to walls I did not necessarily want to be climbable. 
 Keycard pickup and destroy actor in worldspace.
 "Read Letter" and create UI Widget on keypress.

I've also included a quick walkthrough of my level. 
The first 30 seconds are a walkthrough of my first iteration.


Sunday, October 23, 2016

MineCraft Level Design

I wanted to try something challenging. My plan was to learn best practices for UV unwrapping and mapping set-up in Maya, creating textures in Photoshop, practicing whiteboxing and lighting in UE4.

I had originally looked for inspiration from Lord of The Rings and the Dwarven home in the mountain and was looking to make some sort of "dungeon" environment - So I whiteboxed / used BSP brushes in UE4 to plan what I wanted to do.


I of course completely scrapped this idea and looked for something more within scope.
I found an amazing interior location from Paris..


This particular image shows a room well-lit and full of life and vibrant beauty. I wanted a space that borrowed from the really cool architecture, but instead felt a bit more ominous -- aiming for a Castle Wolfenstein vibe. 

I first worked at creating a base cube, slicing and UV Mapping in Maya.


Then I worked on creating a small library of textures I could use to fill out my scene. In retrospect I should have planned out which textures I would need beforehand...but heck, it was good practice.


I started out with BSP brushes and basic UE4 assets to get the layout of what I wanted and feel the size of the space before final build and texturing.


I made a first pass, but the space felt a bit empty and the lighting wasn't particularly eye-pleasing.


Then I added some torches, but they were a bit too RED.


So i changed things up and tried to get a bit more contrast with the lighting and casting some shadows across the scene, along with adding a 'flicker' to the torches.


I also added a 'secret bookshelf' along the back wall that slides away to reveal a secret room. I attempted to highlight it with brighter sconches and a white book in the bookshelf, the only one present in the scene.


Here is the tutorial I followed for the light-flicker effect:
The sliding door tutorial is show in the Unreal Tutorial Playlist here:

I've included a walkthrough of my level. I noticed some artifacting, which I believe is a result of rendering issues due to the large number of actors in my scene, but I will need to keep a better eye on maintaining optimal level size.

Included is a short walkthrough of the level:


Sunday, October 16, 2016

Unreal Engine 4 Practice Level Design

I wanted to learn more about proper level design, lighting, and blueprints in UE4. I was able to create a small room with a logical structure, sliding glass door, and a 'publisher' level light build.

Here is the tutorial I used to create this room: https://youtu.be/I8WBF4AyAX4


Maya Space Scene Practice Render

I was looking to practice basic modeling in Maya, working on applying textures, lighting, animation, camera movement, and finally rendering.

Here is the tutorial I used to create this scene: https://www.youtube.com/watch?v=tElsku3aKQI


3D Week 001 Assignment (UE4 Simple Box Level)


I first created the basic cube, with bevel and smoothed edges in Maya, then imported the .fbx into UE4 for my level creation.

Below I have shown my practice in the material editor, where I created a base material with a boatload of material instances, a 'transparent glass texture' and a Tron-inspired texture.


Here is a link to the Tron Material tutorial I followed to create the material shown:


I was looking to design a level that allowed me to experiment with material instances and the material editor while learning more about the UE4 interface and tools. I wanted to create something that had a 'cyberpunk' feel. I was imagining the Resident Evil retrovirus as an inspiration, shown here below: 


I have created a playable location based on this design -- I imagined it would be in the lobby of a futuristic pharmaceutical company. 

I have currently implemented a staircase that leads to the top and is completely walkable, but if implemented as I imagine, it would instead include a set of elevators that goes along its height. 

I had difficulty lighting the scene properly, but plan to learn from this experience and practice on getting better lighting for my next assignment.